Showing posts with label Recipes and Food. Show all posts

Saturday, October 27, 2012

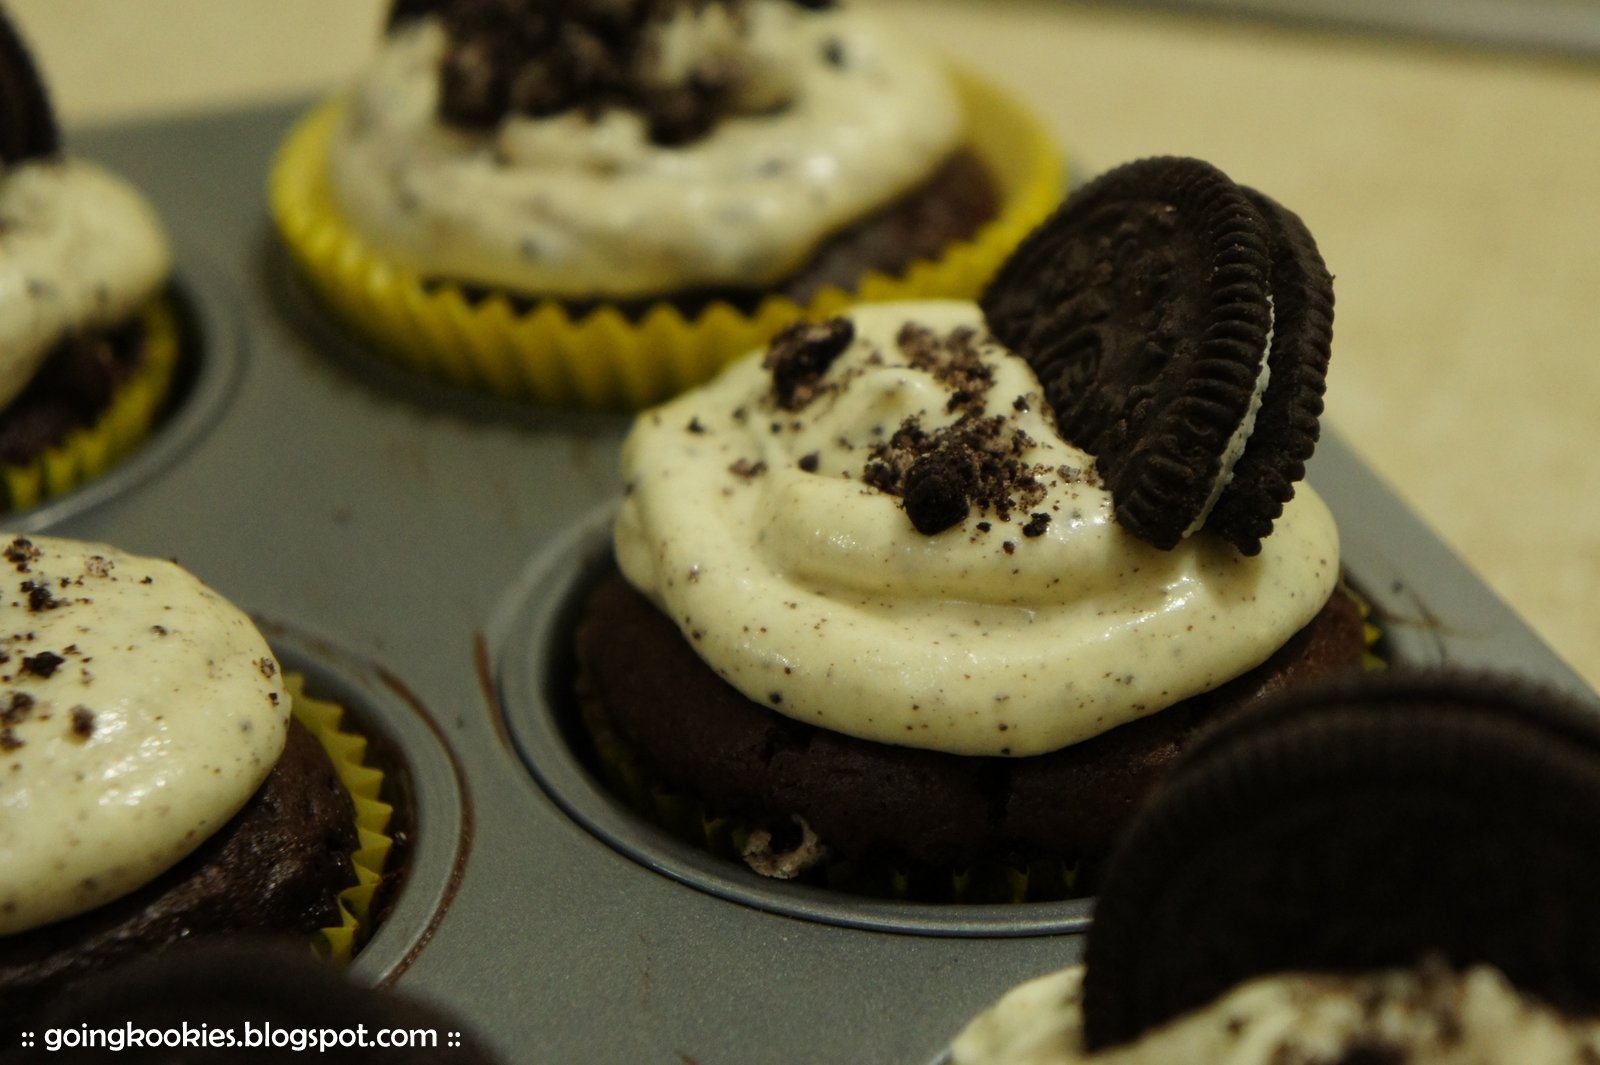
Death by Oreo cupcakes

I felt like I did not make good use of my week.

After Nini's wedding on Saturday, I felt aimless. Before that, I was full on busy trying out ideas upon ideas for her wedding; wedding bouquet, chocolate chip cookies and wrapping, cake topper, beautifying the picture frames and what not. 

It was tiring and kept me busy but I enjoyed it. Sourcing for ideas and testing them out in practical to see if it really looks as pretty in reality as it did in my head. Lols.

Back to aimless wandering me.

Hence, yesterday, I decided to try my hand at cupcake baking. So far, I've never made (in my opinion) a successful tasting cupcake despite two attempts. Haha. Just two tries and I expect to be a pro. Silly isn't it.

And people say, third time's the charm... right?

Followed Death by Oreo Cupcake recipe from HERE. Feel free to try it out and tell your baking story!


Had to improvised from original recipe as I ran out of Oreos and my frosting wasn't turning out well


My newly bought AUD7 Christmas cupcake stand
Guess what? Third time WASN'T the charm in this case. Mr. C really liked the cupcake but I felt that my icing was too sweet despite using less icing sugar than stated in recipe. For that, icing wasn't firm but had a more runny texture.

Felt a bit disappointed that my cupcake wasn't as YUM as I had hope it to be. But I won't give up. I'll try baking again and again and again till I get the right tasting cupcake with topping that's tasty and scrumptious but not too sweet either.

Stay tuned for a *fingers and toes crossed* successful baking cupcake story!!
Posted by Picasa

Monday, July 30, 2012

RECIPE : Sticky Date Pudding the Master Chef way

Mr. C and I decided to try the buffet at Village Green at the corner of Springvale Road and Ferntree Gully Road in Glen Waverley. Gosh. It was AUD22 per adult. We really should have just gone straight to Springvale for Pho as planned 'cos I deemed the food at Village Green just not worth it.

There was a variety of food like a typical buffet spread but the taste of the food was just lacking. I can only stomach the fried spring roll, Chinese fried noodles and stir fried chicken where else Mr. C liked the roast pork. 

I am a sticky date pudding fan and I was ECSTATIC to see them offer that. However, when I went to get a scoop of it, it looked really mushy and wet. But you know what? I figured to give it a benefit of a doubt and boy did I regret it.

IT was just way too mushy and wet. Somehow, when I swallow anything that my tastebuds dislike, my body rejects and first reaction is to gag. Thank God nothing came out.


Bought my dates from Coles and boy, it's tough to chop them up!! Gets all sticky and goeey...

Which leads to this post. In the past, I've had my fair share of Sticky Date Pudding. And most times, it costs AUD8-15 per serving depending where you have it. However, when I found this recipe on Master Chef and tried my hand at making it, I rarely order this pudding when I eat out.

WHY?? well...

#1 The Master Chef recipe is extremely easy to follow. 

#2 It is waaaay cheaper to bake your own at home as opposed to buying it. It costs less than AUD15 to make one whole cake worth instead of a measly piece out in shops.

#3 Not only is it cost efficient to make it at home, it tastes REALLY good. Even better than more than half of those I've had in shops. 

#4 I made for Mr. C's colleagues and they LOVED LOVED it. I made it for Sal and she loved it! Mr. C's colleague and Sal asked for the recipe and found it easy to make and the people they served it to loved the pudding to bits!

Below is the recipe taken from Master Chef's website. The recipe is by Master Chef 2011 contestant, Rachel McSweeney. I am eternally grateful to her for sharing such a wonderful dessert with easy to follow instructions!

Pre-chopped dates

Ingredients required for PUDDING:
- 340g dried dates, pitted and chopped
- 2 teaspoons of bicarbonate soda
- 500ml water
- 120g water
- 340g brown sugar
- 4eggs, lightly beaten
- 1 teaspoon vanilla extract
- 340g self-raising flour

for SAUCE:
- 400g brown sugar
- 200ml cream
- 250g butter

METHOD:
1) Preheat oven to 150 degrees celcius. Grease baking paper and line it around 26cm spring foam cake tin.

2) Place dates, bi-carb and water into a large saucepan and bring to the boil.

3) Reduce heat to low and simmer, stirring until dates break down. Turn off heat and cool slightly.


4) Add butter, stir until melted and fully combined.

5) Mix in brown sugar, add eggs and vanilla and stir well to combine.

6) Fold in sifted flour until just combined.


Everything looked easy and right up till this part...


I thought I did it wrongly cos it looked lumpy and gross after folding in the flour...
 

But you know what? I followed the instructions right and was blessed with YUM pudding!!


7) Pour into prepared tin and bake for 1 hour or until a skewer inserted comes out clean. Cool in tin.

8) For sauce, place all ingredients into a saucepan and bring to the boil. Reduce heat and simmer for minutes until golden.

9) To serve, slice pudding and cover generously with sauce.

Preparation and cooking time : Approximately 90 minutes.

Serves : 12 (according to the website but for me, it can easily serve to 20 pieces and slightly more)
 

From the oven

About 22 pieces... for me and Mr. C's colleagues


More awesome points to making this pudding.. you can keep it for a week or even more. And when you crave for something sweet and delicious, just pop a slice or two into the microwave oven for about 15-20 seconds. Topped it off with the awesome tasting but super sweet and ready made butterscotch vanilla  with ice cream (I used chocolate chip cookies 'cos that was in my freezer)!!
 
Posted by Picasa

Tuesday, June 5, 2012

Banana Cake


After my Sydney visit, I've been itching to try my hand at baking this banana cake after obtaining the recipe from my sister's friend, Lorna. I've heard my sister rave about her friend's banana cake for awhile now and for my sister to go on and on about it, it's gotta be good. Not because my sister has exquisite food palate nor because she is a food critic but mainly due to her aversion to bananas. 

You see, for the longest time ever I've known my sister, she's never fancied the taste of bananas. When I was at her friend's house in Sydney, I was fortunate to have a taste of this delectable morsel. The cake was moist and heavenly. One piece alone was not enough. And trust me, it was good. Lol.

And I, too dislike banana. So, for both of us to like this cake, it really means it is that good.

So, on my off day, I made yummilicious banana cake. Mr. C enjoyed it more than my Sugi and butter cake. Success! Can't wait to bake this again...
 
 
Posted by Picasa

Thursday, February 9, 2012

RECIPE : Aglio Olio Mr. C style

I always thought all pasta dish were complex and required lots of hard work to cook up but it really isn't! ;) This is the second time Mr. C is cooking this dish. It doesn't taste 100% like the Aglio Olio you get from outside but it still tastes YUM! And I am not saying this just because he's my hubby. I take my pasta seriously!
You definitely need spaghetti, prawns, scallops (we just added this in, you can also put in other seafood ie squid) and lots of chopped garlic!

Serving : 2
Preparation time : 5 - 10 minutes
Cooking time : 30 minutes

Simple and easy to follow method :
1) Firstly, boil a pot of hot water. Put a tablespoon of salt and oil into the boiling water.

2) When water starts to bubble, put in the Spaghetti, off the fire and cover the pot for about 7-10minutes depending on what is stated on your Spaghetti pack.
(You can also leave fire on if you so desire but check to make sure Spaghetti is not over boiled and becomes soggy)

3) As you're boiling water and Spaghetti, boil another pot of hot water to cook and 'clean' the prawns.

4) Once water starts bubbling, add in the prawn and leave it in for about 3-5minutes. You don't want to overcooked the prawns, only to rid the fishy smell and taste. Bear in mind that you also have to fry it later with the Spaghetti, so, if it's semi cooked, it's alright.
(uncooked prawns look transluscent and blue ish where else as it cooks, it turns orange in colour)

5) Heat up wok, put 2 tablespoon olive oil, stir fry the garlic and red chili. Next, add in the prawn and stir fry for about 3-5 minutes. After you've sieved the Spaghetti, add it into the frying wok and after 5-10 minutes of continuous stir frying, VOILA!

Your meal, is ready. ;)

It really is that simple to make this pasta dish. Try it out and add your own garnishing to make this pasta dish your own style!
Posted by Picasa

Sunday, February 5, 2012

Saturday, February 4, 2012

2012 Pics #23 My nuts

I feel happy when I take nice pictures like this. Gives me hope.
Posted by Picasa